


The gadget cache we built at the Maker Magic event uses switches in series to reveal the combination by turning on a blue LED. For this Tech Tuesday we will be talking about switches.
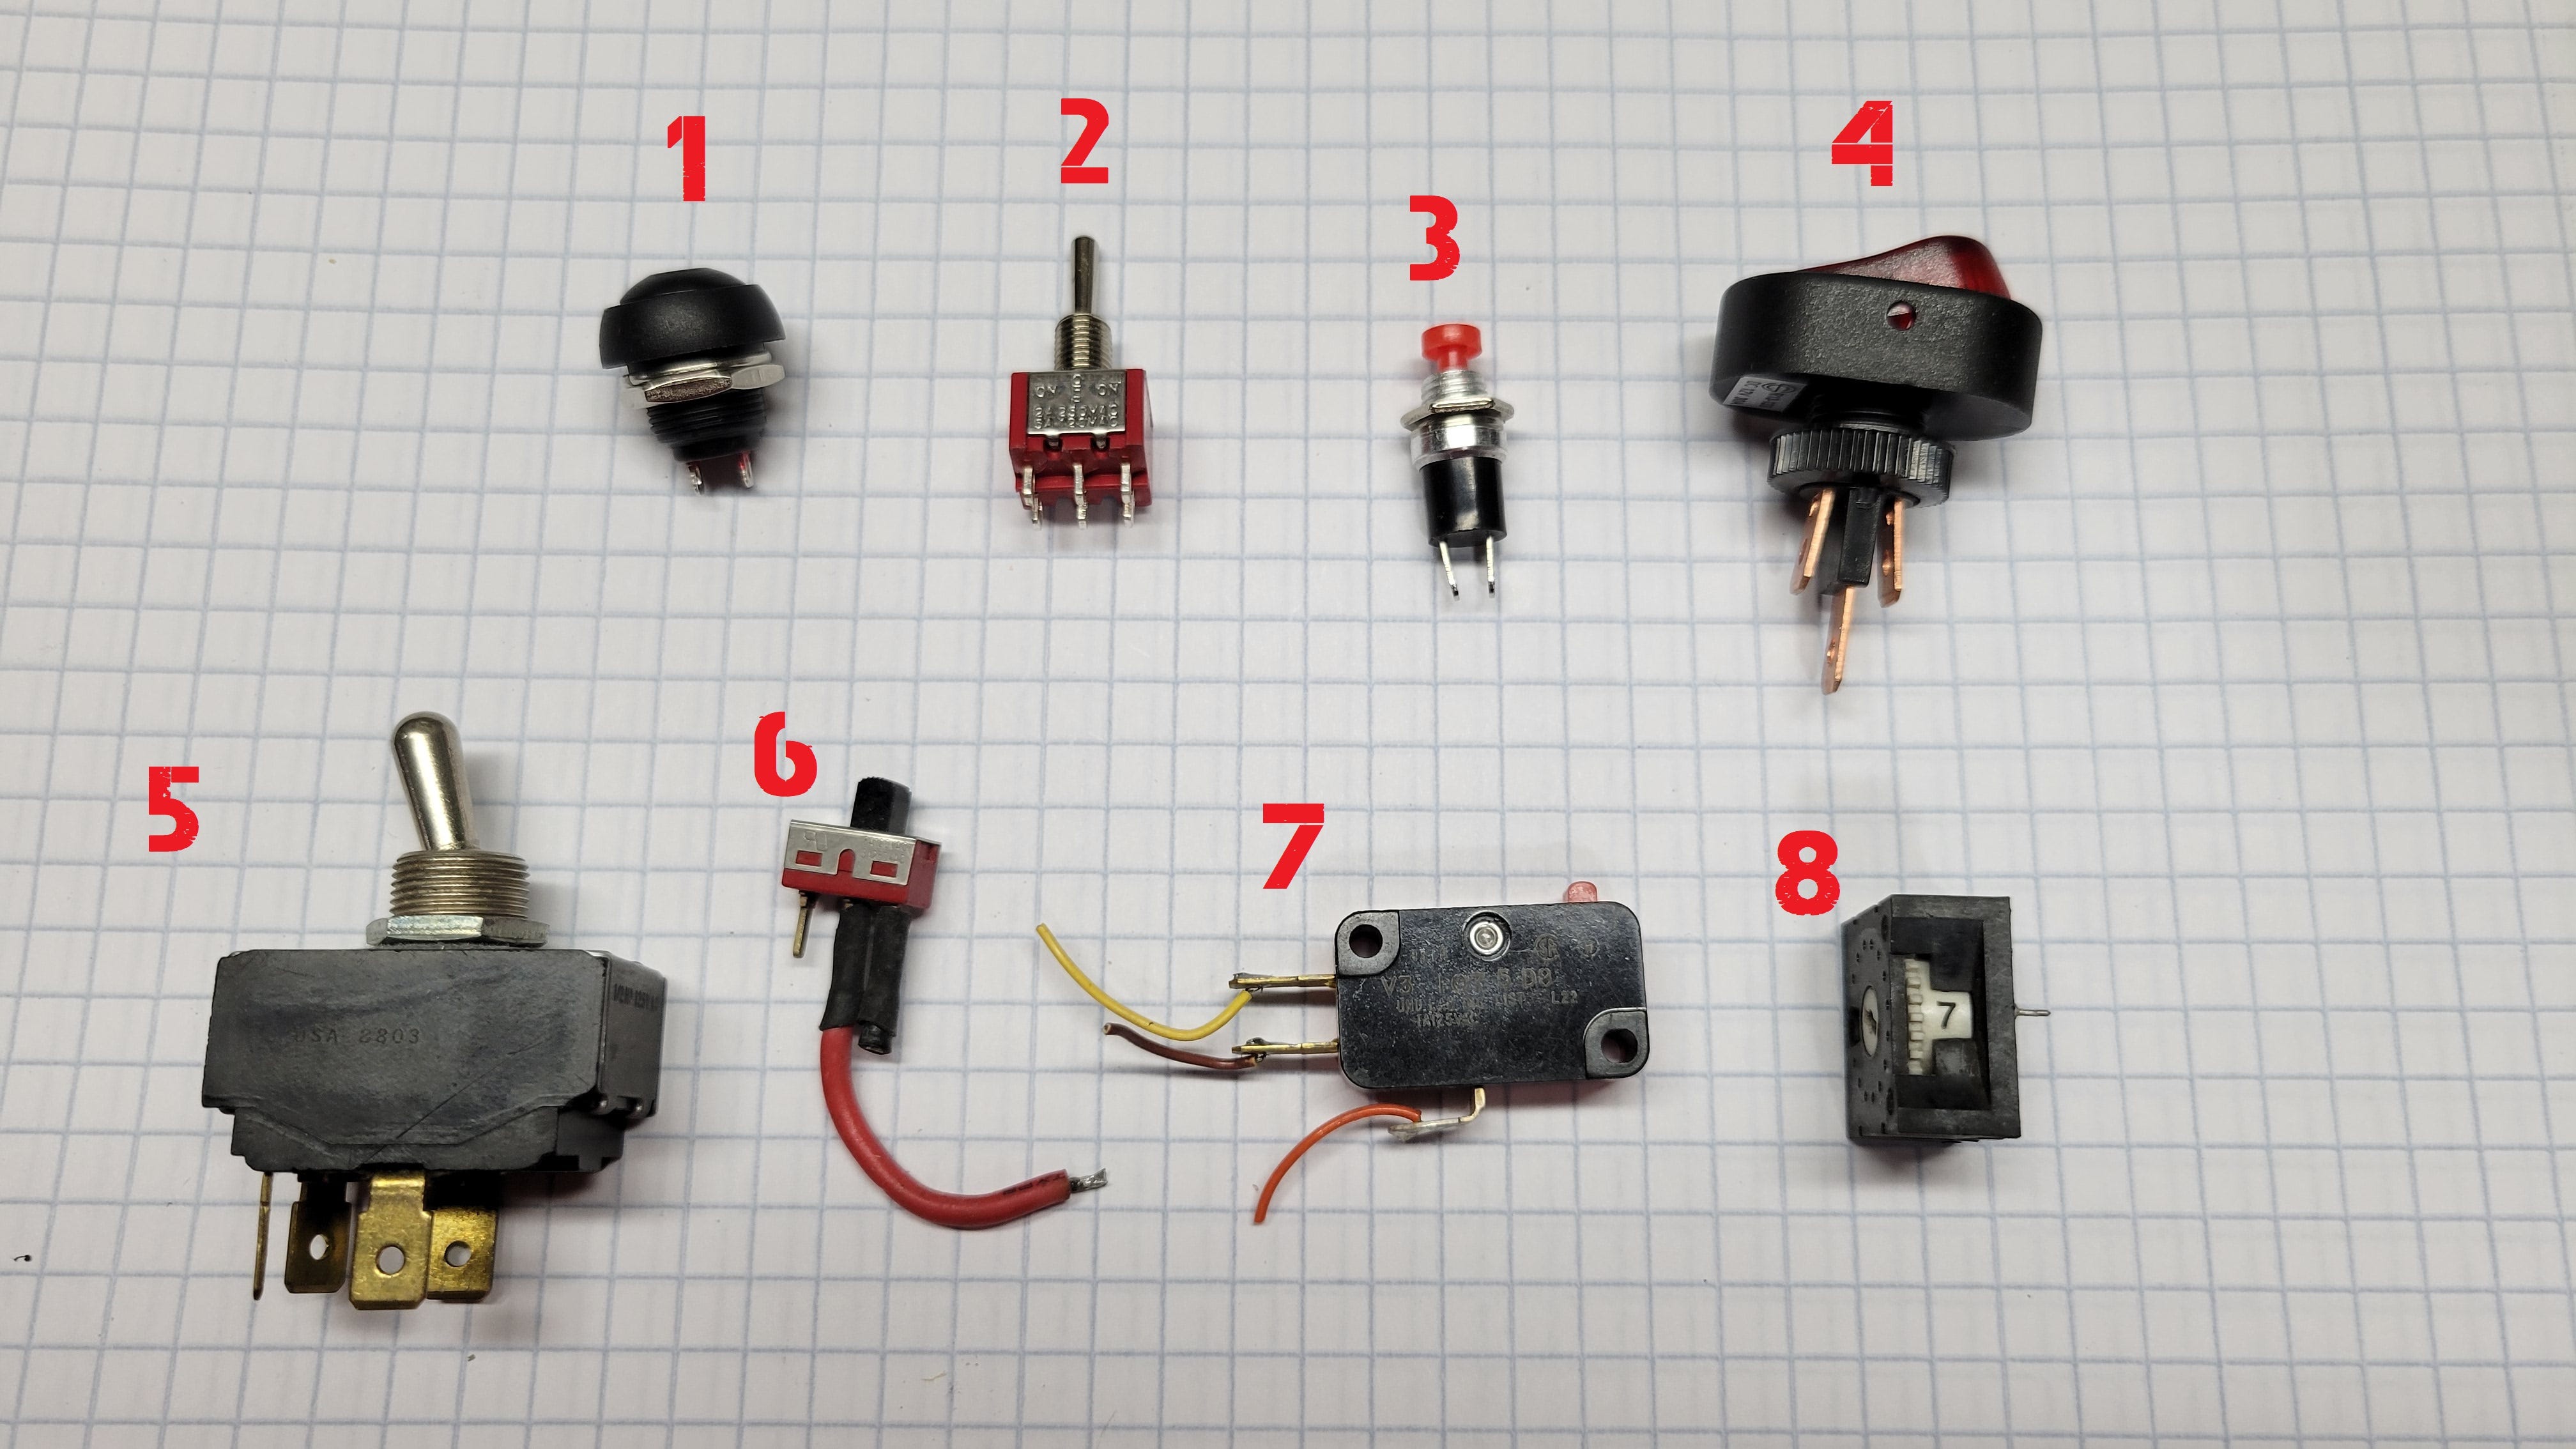
Switches come in many different types. The opening photo shows a few different types of switches from my parts bin.
Pushbutton SPST
Center off toggle DPDT
Pushbutton SPST
Rocker SPST with an additional connection for the internal LED
Toggle DPST
Slide SPDT
Microswitch SPDT
Rotary switch with multiple positions
Our gadget uses MOM center off DPDT switches, but we wire them as if they were SPDT. Got that? By now you have probably realized that there are some other things to learn besides just the operator style (toggle, pushbutton, etc.) No matter the operator style, there are some common descriptive terms used to explain the electrical properties of switches.
Switches are described with the number of poles, which is the number of contact sets in the switch. Next is the number of throws, or how many positions each pole has. For example, the simple on/off light switch on the wall of your room is a single pole single throw (SPST) switch. It has one set of contacts and can connect or disconnect one circuit.

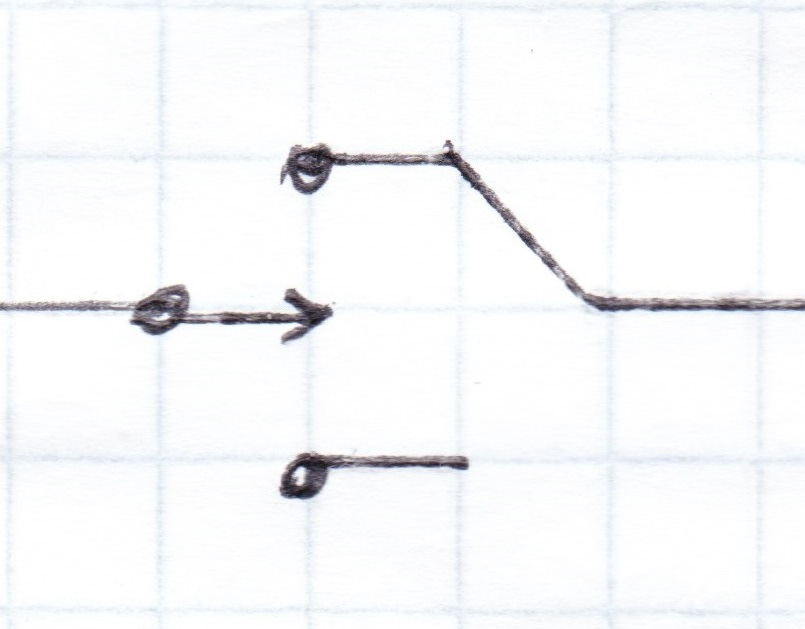
This sketch shows SPST switches as toggle switches (top) and as pushbuttons (bottom). When we draw our switches in a schematic diagram, we draw them as they are at rest (not pushed). That is why we need to specify the state of the pushbutton switches. By looking at them we cannot tell if they connect the contacts or not when at rest. To explain the type of switch we use the term normally open (NO) or normally closed (NC). The pushbutton on the left is NO, which can be seen by the contacts not connected when at rest. This switch completes the circuit when the button is pressed. The pushbutton on the right is NC since it connects the contacts when at rest and opens them when pressed.
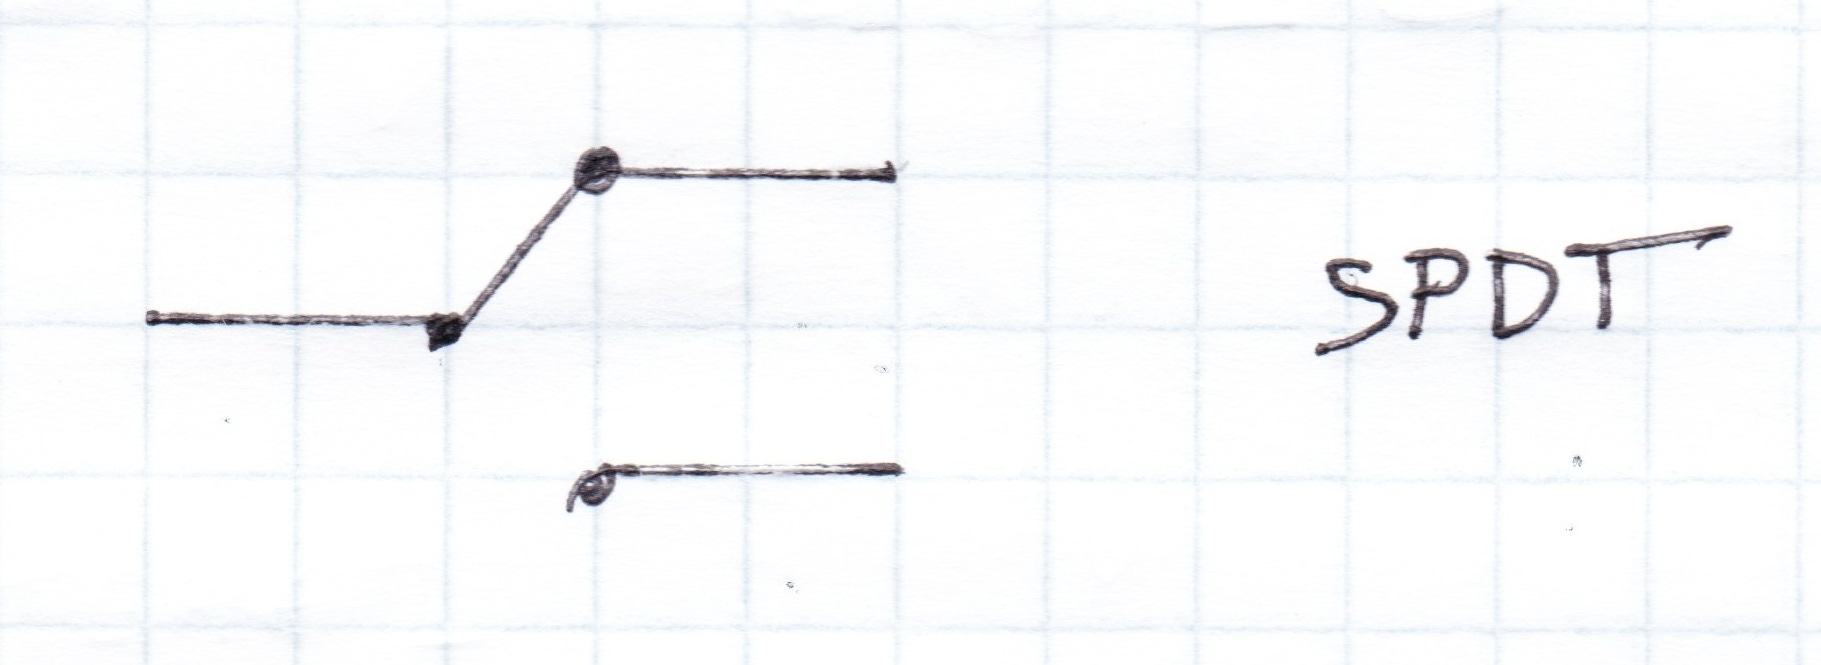
A single pole double throw switch connects to one of two possible connections as shown here. The switch has three terminals, with one being common and the other two as the possible connected contacts.
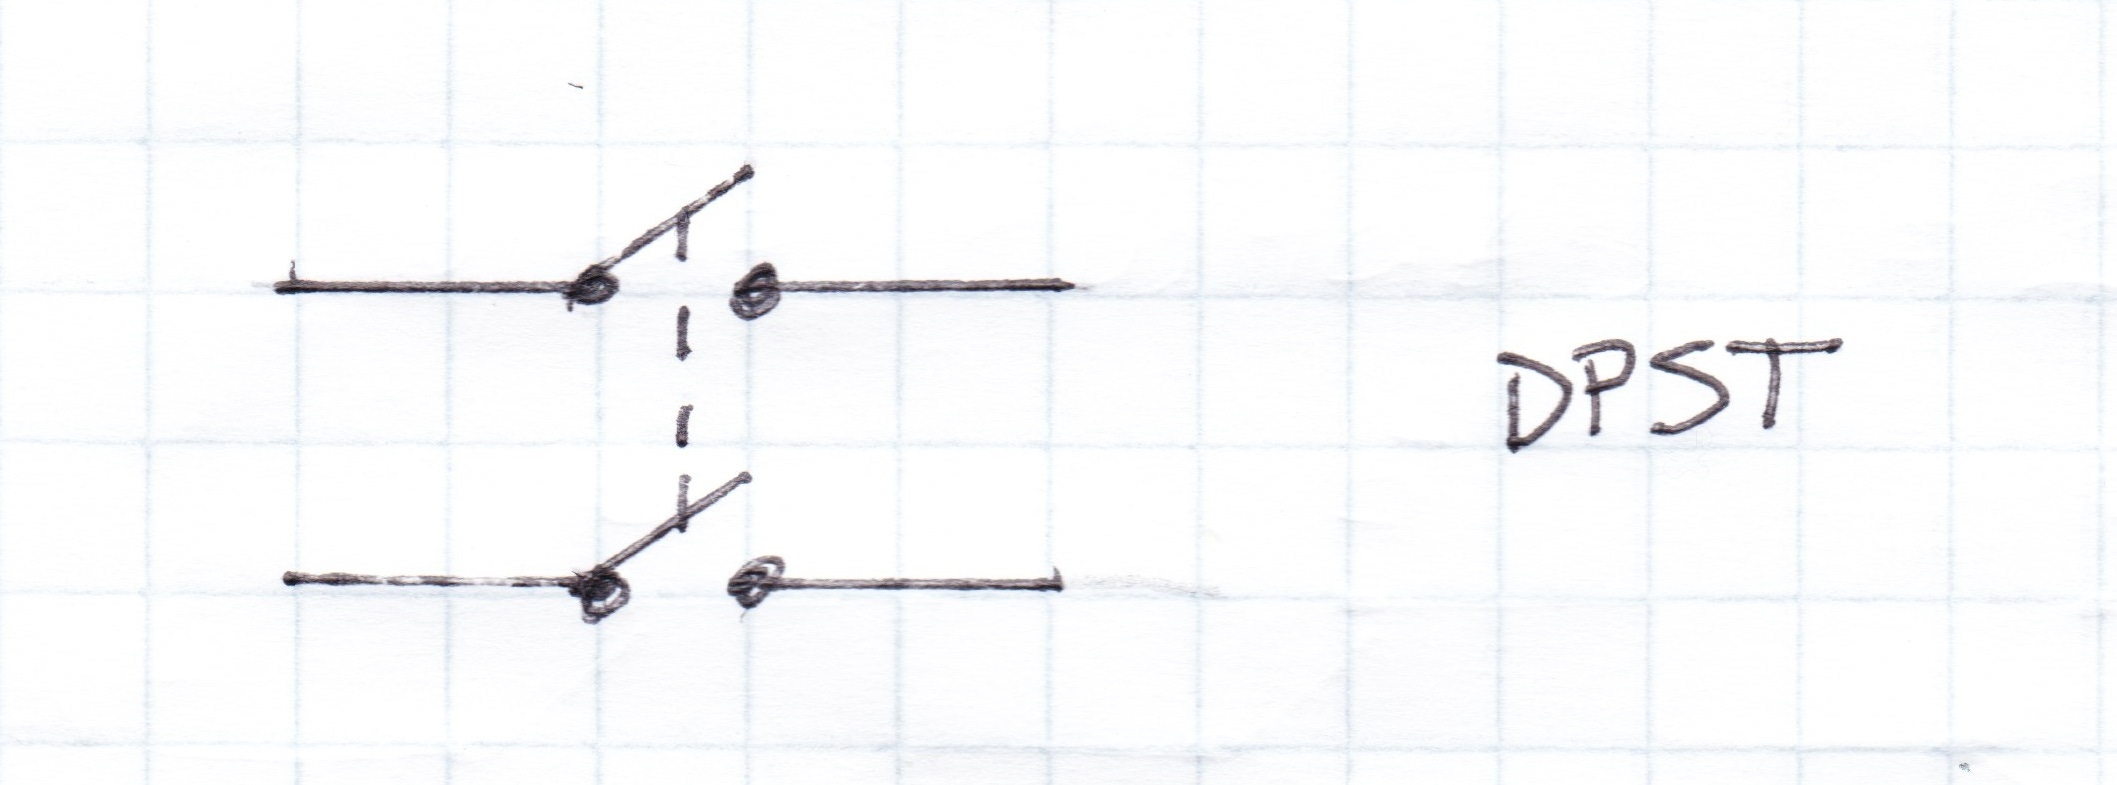
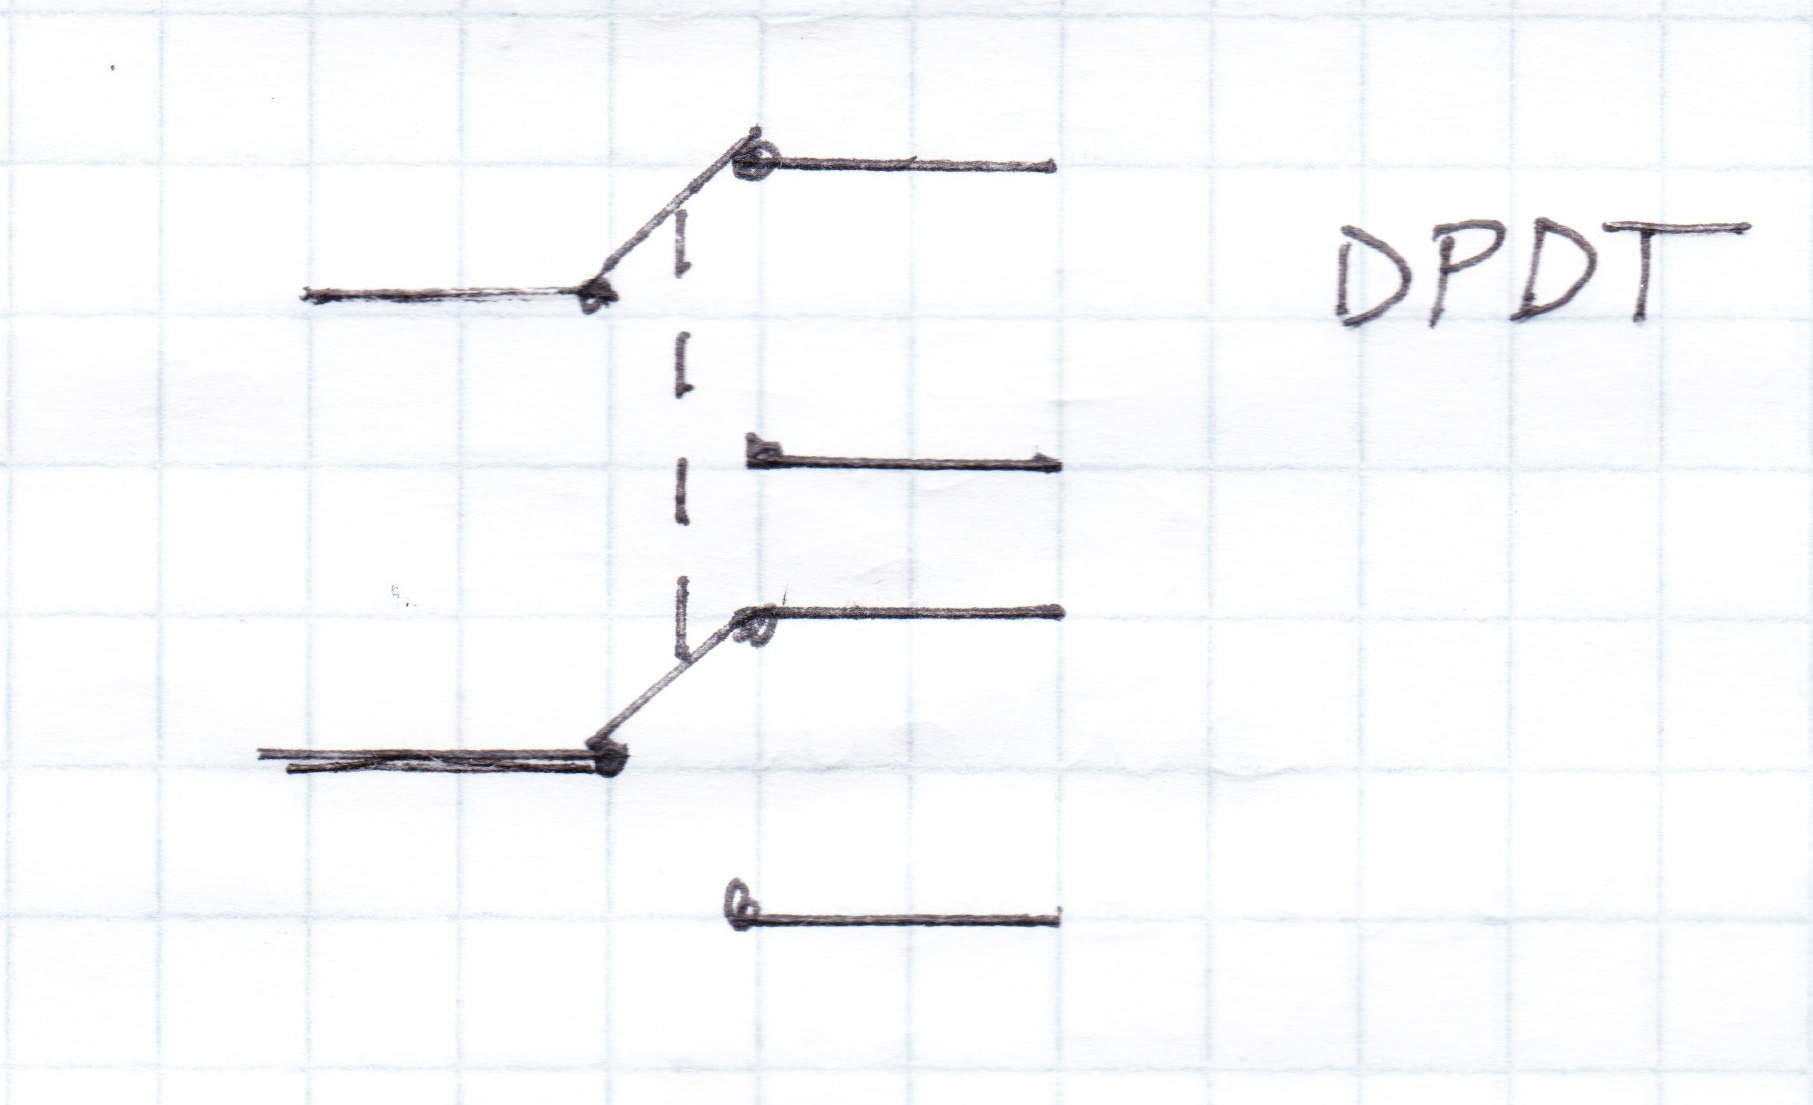
What if we want to switch more than one independent circuit at the same time? We add additional poles to the switch. We can connect two single throw or double throw switches together and make a double pole version of them. Each set of contacts move together but are electrically isolated.
The light switch on your wall moves when you push on it and it stays in that new position. The lights stay on until you touch the switch again to turn them off. Not all switches work this way. Some switches have a spring inside that returns the switch to a set position when force is removed. These are called momentary or spring return switches. Sometimes momentary is shown as MOM in the switch description. Momentary switches are most often pushbuttons but not always.
SPDT or DPDT toggle switches can have a center off position so that they only connect one of the two circuits when force is applied. We used this style DPDT center off momentary switch in our event gadget. The switch is drawn at rest with no connection made. Momentary switches are useful for making gadget caches because the finder can’t accidentally leave the gadget’s power on, or leave without resetting the puzzle. With center off spring return switches our gadget will always reset itself when the finder leaves.
Once you decide on the type of operator, the number of poles and throws, and other details of the switch you need for your project, there is one final thing to consider. The electrical rating of the switch must be matched to how you want to use it. This covers the voltage it can withstand, and the amount of current that can pass through it without damage. Gadget caches are almost always small voltage and low current devices, so it is hard to go wrong when choosing switches. In gadgets, solenoids and motors will probably be the largest current draw items. For other applications like the lighting in your home, turning on a motor, switching 120VAC mains voltage, or other tasks the switch’s electrical ratings will need to be considered carefully to avoid damaging the switch or hurting someone.
That’s it for this week’s Tech Tuesday. The article should give you enough info to choose the switches you need for your typical projects. If you have any questions please place them in the comments. Next week’s topic will be LEDs and how to use them correctly.