
Repurpose Solar Lights for Your Gadget
The post I didn't expect to make

I had planned to start a series about sound in gadget caches this week, but while working on an unrelated project I decided to talk about solar lights instead. I needed to make a nighttime marker using colored LEDs that would not quickly consume its batteries. The solar garden lights that go on clearance at the end of the summer seemed like a good place to start.
After a quick trip to the clearance aisle at the local low cost store, I brought home a 10 lumen garden light that was already in a low profile form factor.
A few screws, some glue, and a bit of broken plastic later and I had all the parts removed from the light and arranged on the bench as shown in the first photo. The spec sheet says that it can provide up to 8 hours from the included 700mAh NiMh AA battery. While the best performance comes from the lights that use Li-Ion batteries, the NiMh is not bad. Avoid the old NiCd battery lights as their batteries wear out relatively quickly. Always look for lights that use replaceable batteries of a common type, like the AA cell found here.
700mAh capacity over 8 hours is 87.5mA per hour. That’s what we could pull from the battery at 100% efficiency to get that 8 hour run time. I measured the current from the battery at 53mA so even with efficiency losses the runtime seemed real. Cheap solar lights are notorious for wide variance in battery capacity compared to what is on the label, so YMMV. You can always replace the included battery with a known good one of the same battery chemistry.
What about the LED? I knew I wanted to remove the white LED and use other LEDs to get colors. The single LED in the light was rated at 10 lumens and measured 2.7V forward voltage across the LED. That’s 1.2V in from the NiMh battery and 2.7V out to the LED. There is no resistor used to limit current to the LED. This is nothing like our lesson on LEDs from a few weeks ago. What does the circuit look like?
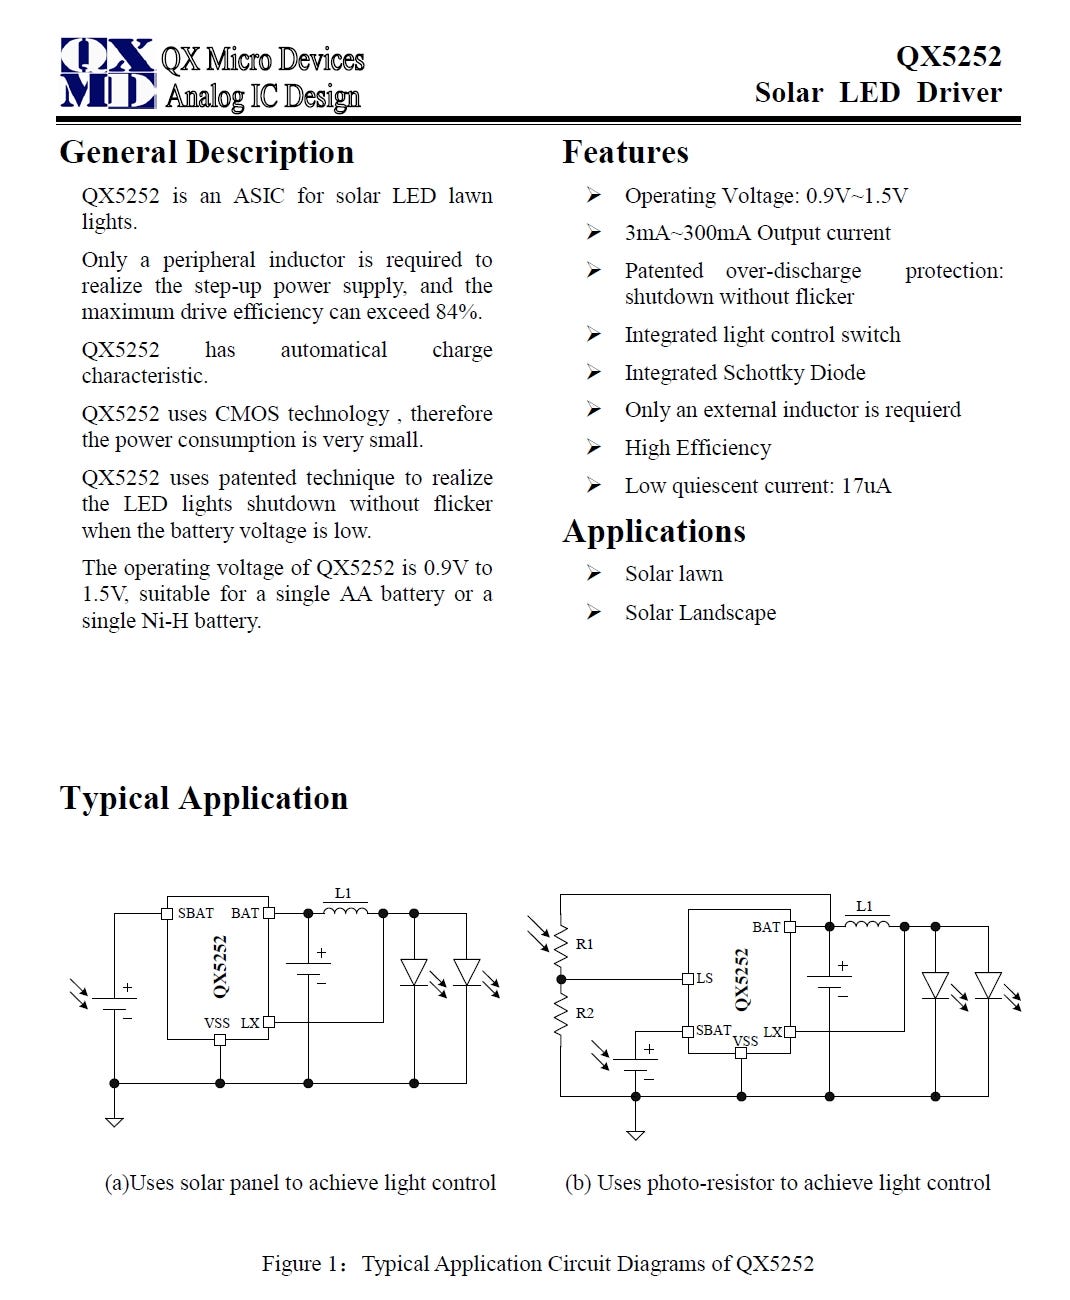
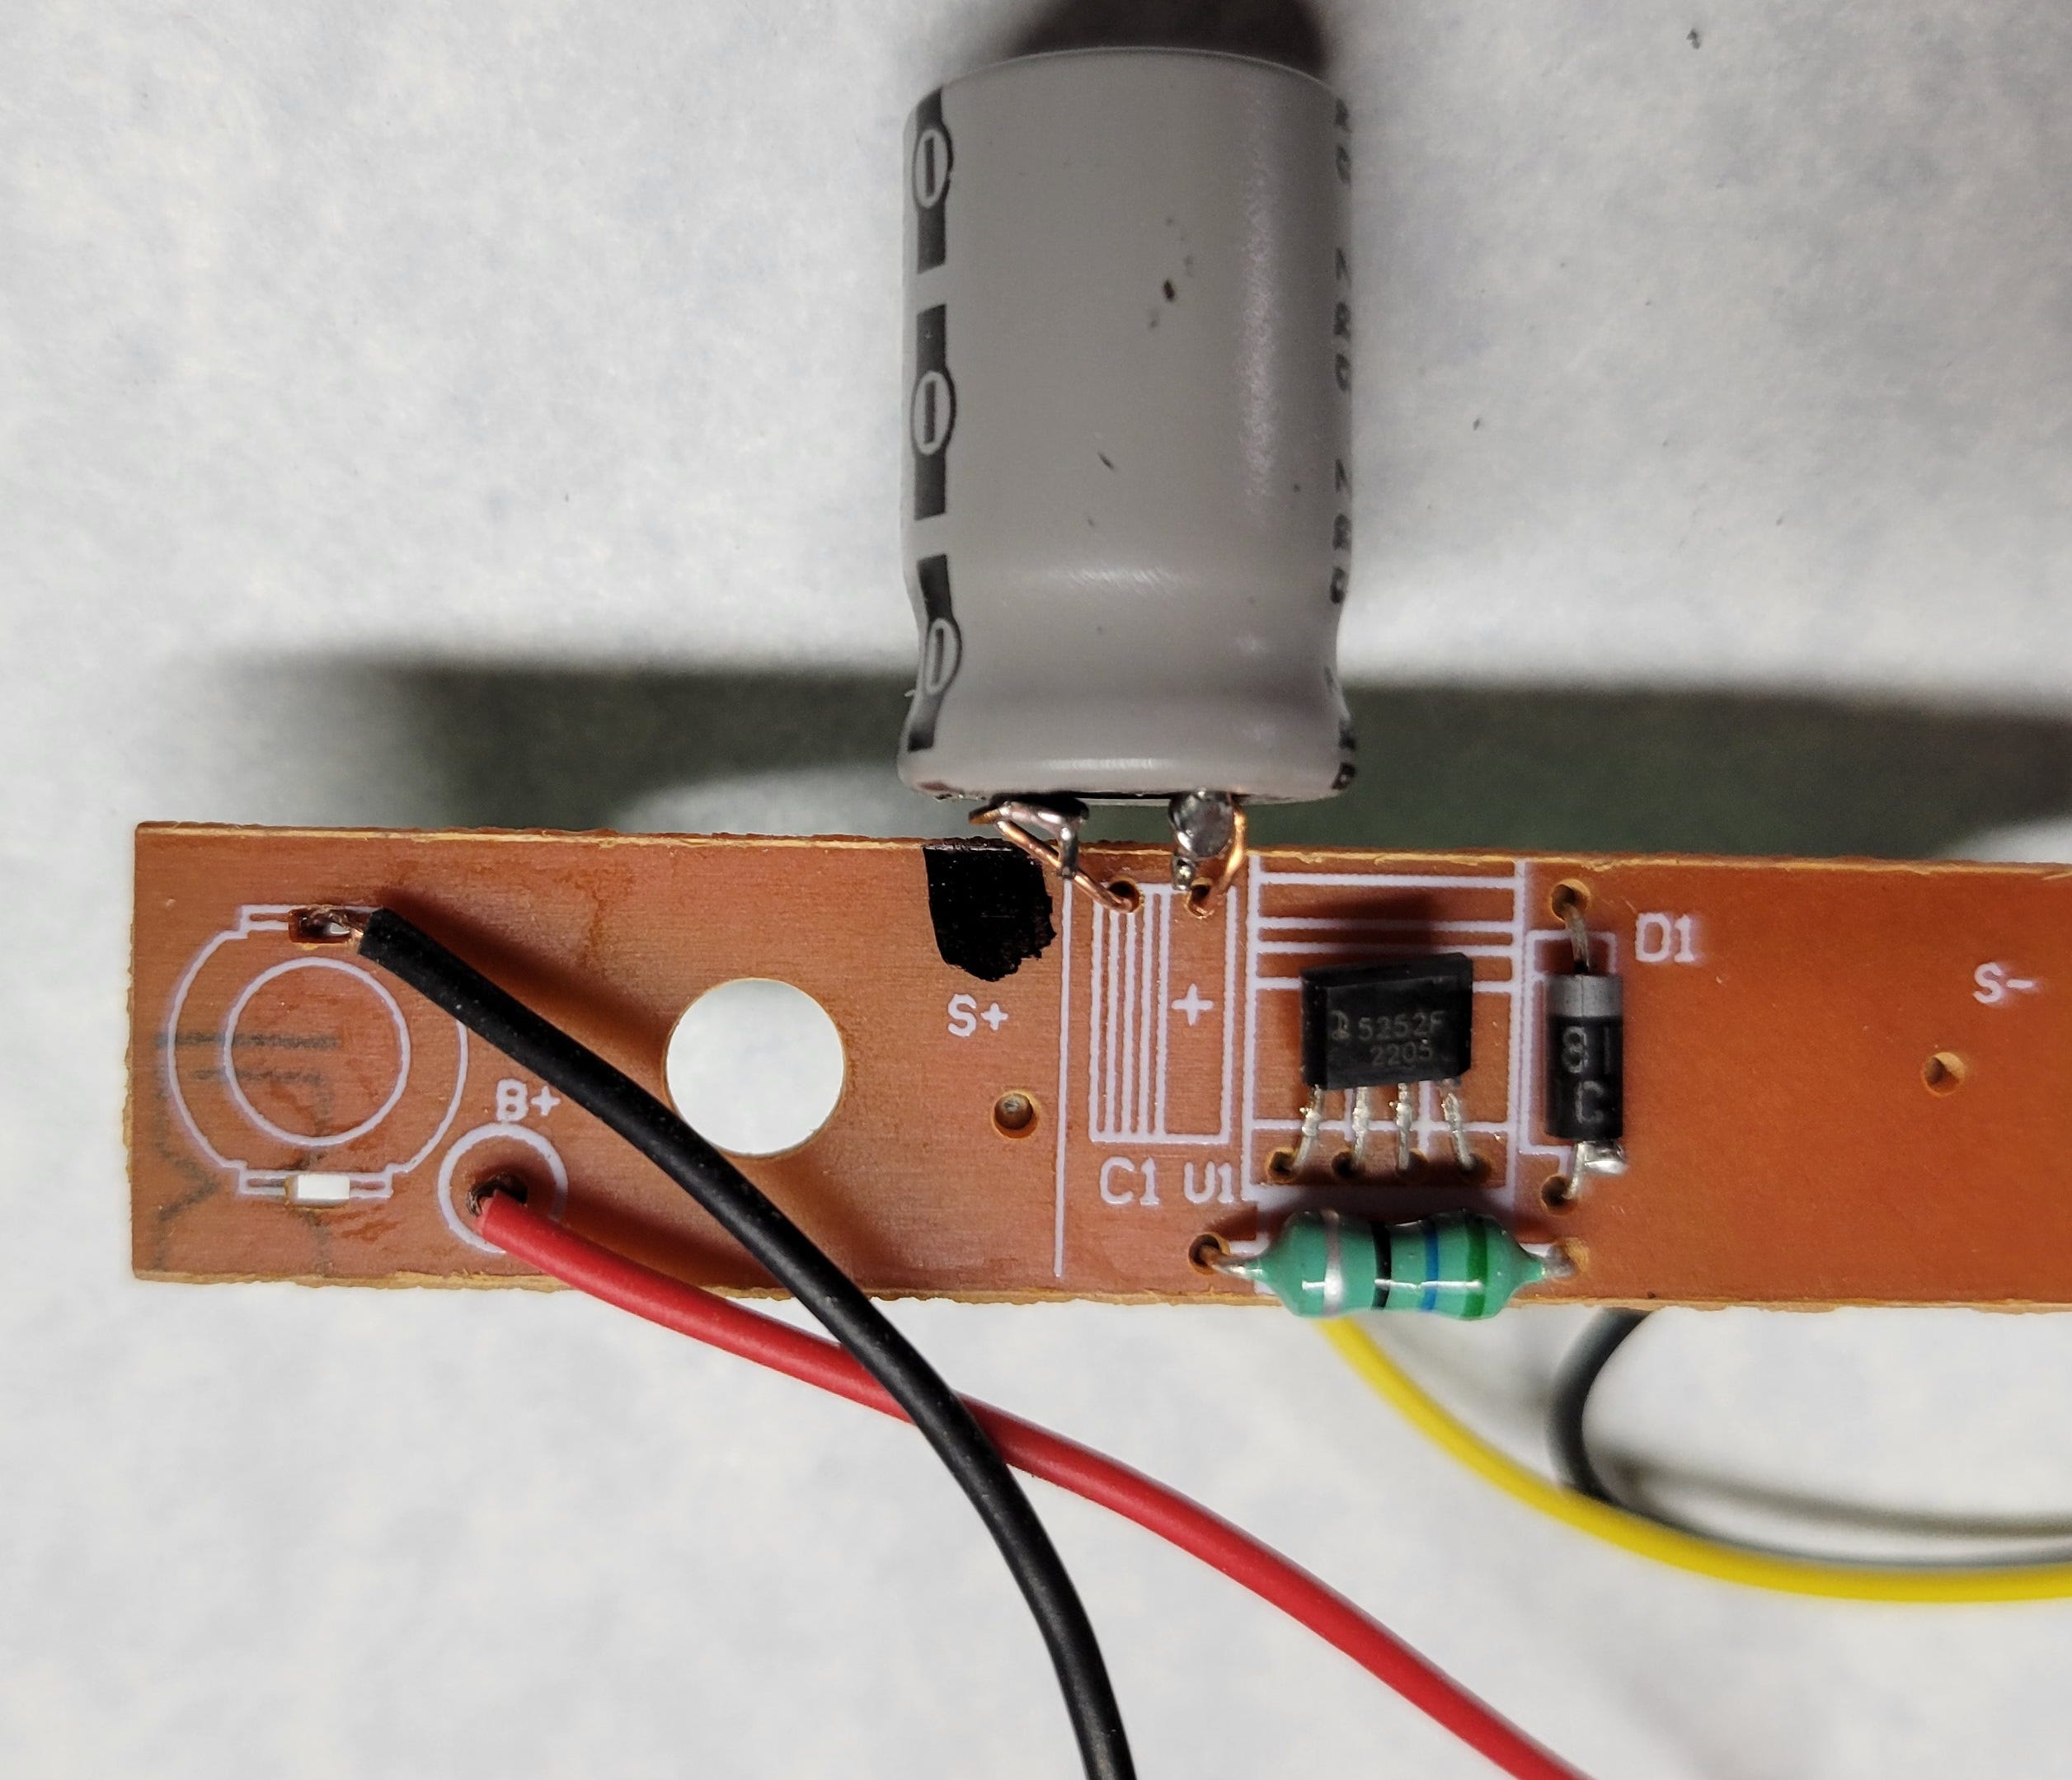
5252F integrated circuit TO-94 case style
47uF electrolytic capacitor
Diode
56uH inductor (colors read like a resistor)
In what might be a miracle in the world of cheap, custom unmarked ICs, the 5252F is well documented as a dedicated solar light driver. In this case we are using the typical application circuit on the left without a light sensing resistor to turn the LEDs on and off.
All we need is the solar cell, IC, inductor, battery, and LED. So what are the capacitor and diode doing in there? First let’s look at how the basic circuit works.
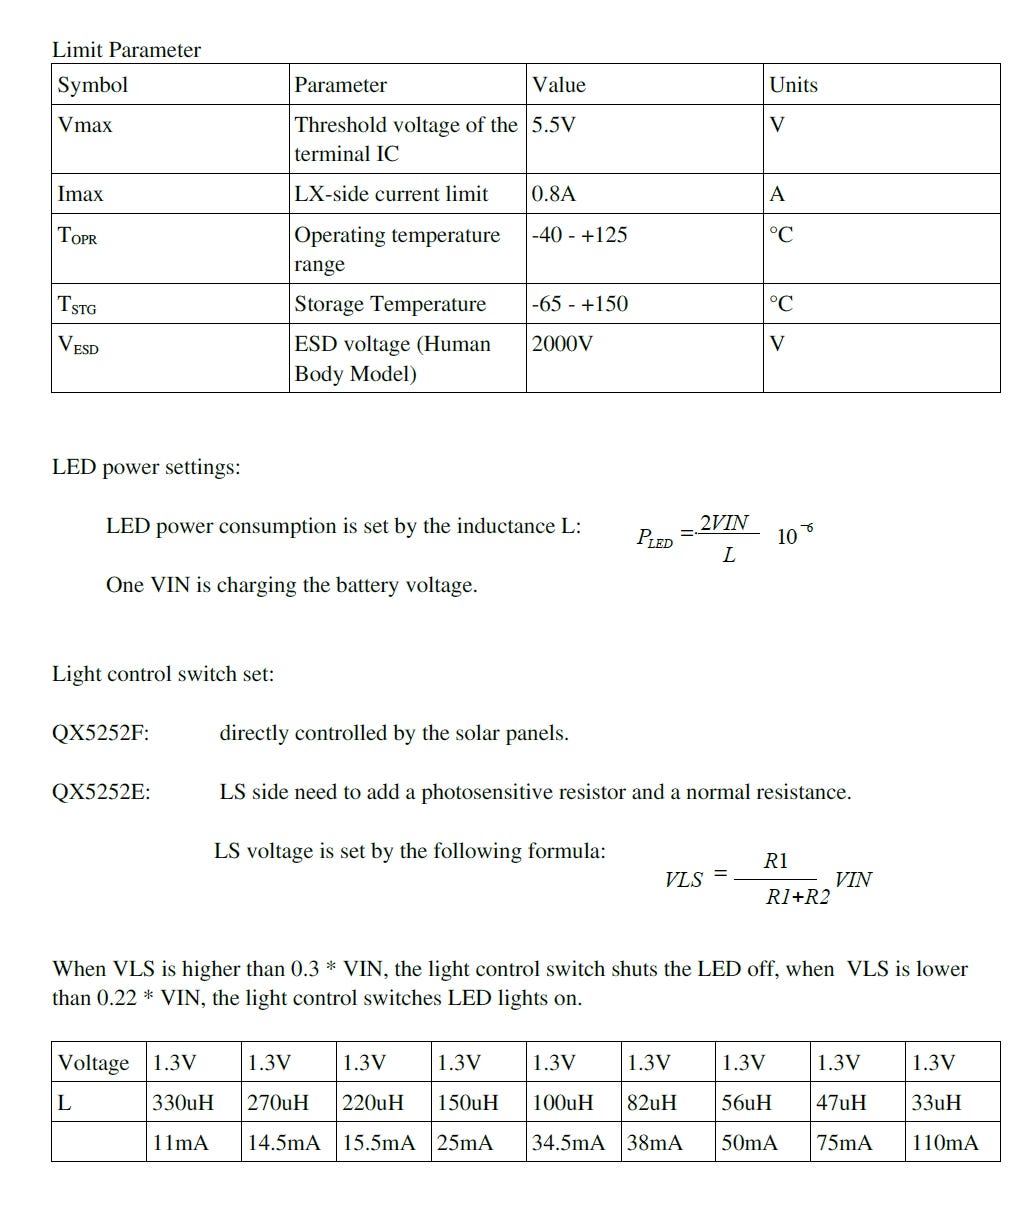
This page from the data sheet shows all the calculations needed to choose the inductor and other settings if designing from scratch. Note that the table includes inductor values so there is no need to do the math. That makes life much easier. We have a 56uH inductor, so we should get up to 50mA available for the LEDs. If we use the common 20mA current for common bright colored LEDs we can light a few of them without problems. Since this is a LED driver, it is controlling the current to the LEDs and no external resistors are needed. In simple terms, this means we can remove the original LED and replace it with a few colored LEDs without changing anything else. But what about the capacitor and diode?
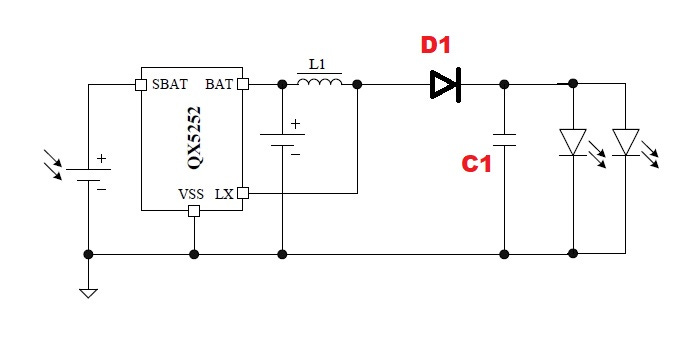
Diodes act as a one way gate for electrons. Capacitors store energy. (That’s the simplistic version, but it works here.) To get the boosted voltage for the LED from the lower battery voltage, the IC contains a step up power supply. Without going into details, the output of the step up supply is a pulsed voltage. The pulses come so quickly that the human eye sees the LED as always on, but it really is not. That’s fine for single color LEDS and the diode and cap are not needed - unless you want to use an RGB color changing LED. These LEDs have a small circuit inside that drives the red, blue, and green LED elements. If the voltage turns off, the circuit starts over. I wanted to use two RGB LEDs, so I was lucky the other parts were already in this light. When the output of the circuit is on, the capacitor is charged. When it is off, the diode prevents the charged capacitor from feeding back into the rest of the circuit, whilc the capacitor discharges like a tiny battery to keep the LEDs powered.
I added a different battery holder to use a AAA NiMh battery as well as my two RGB LEDs and ended up with this:
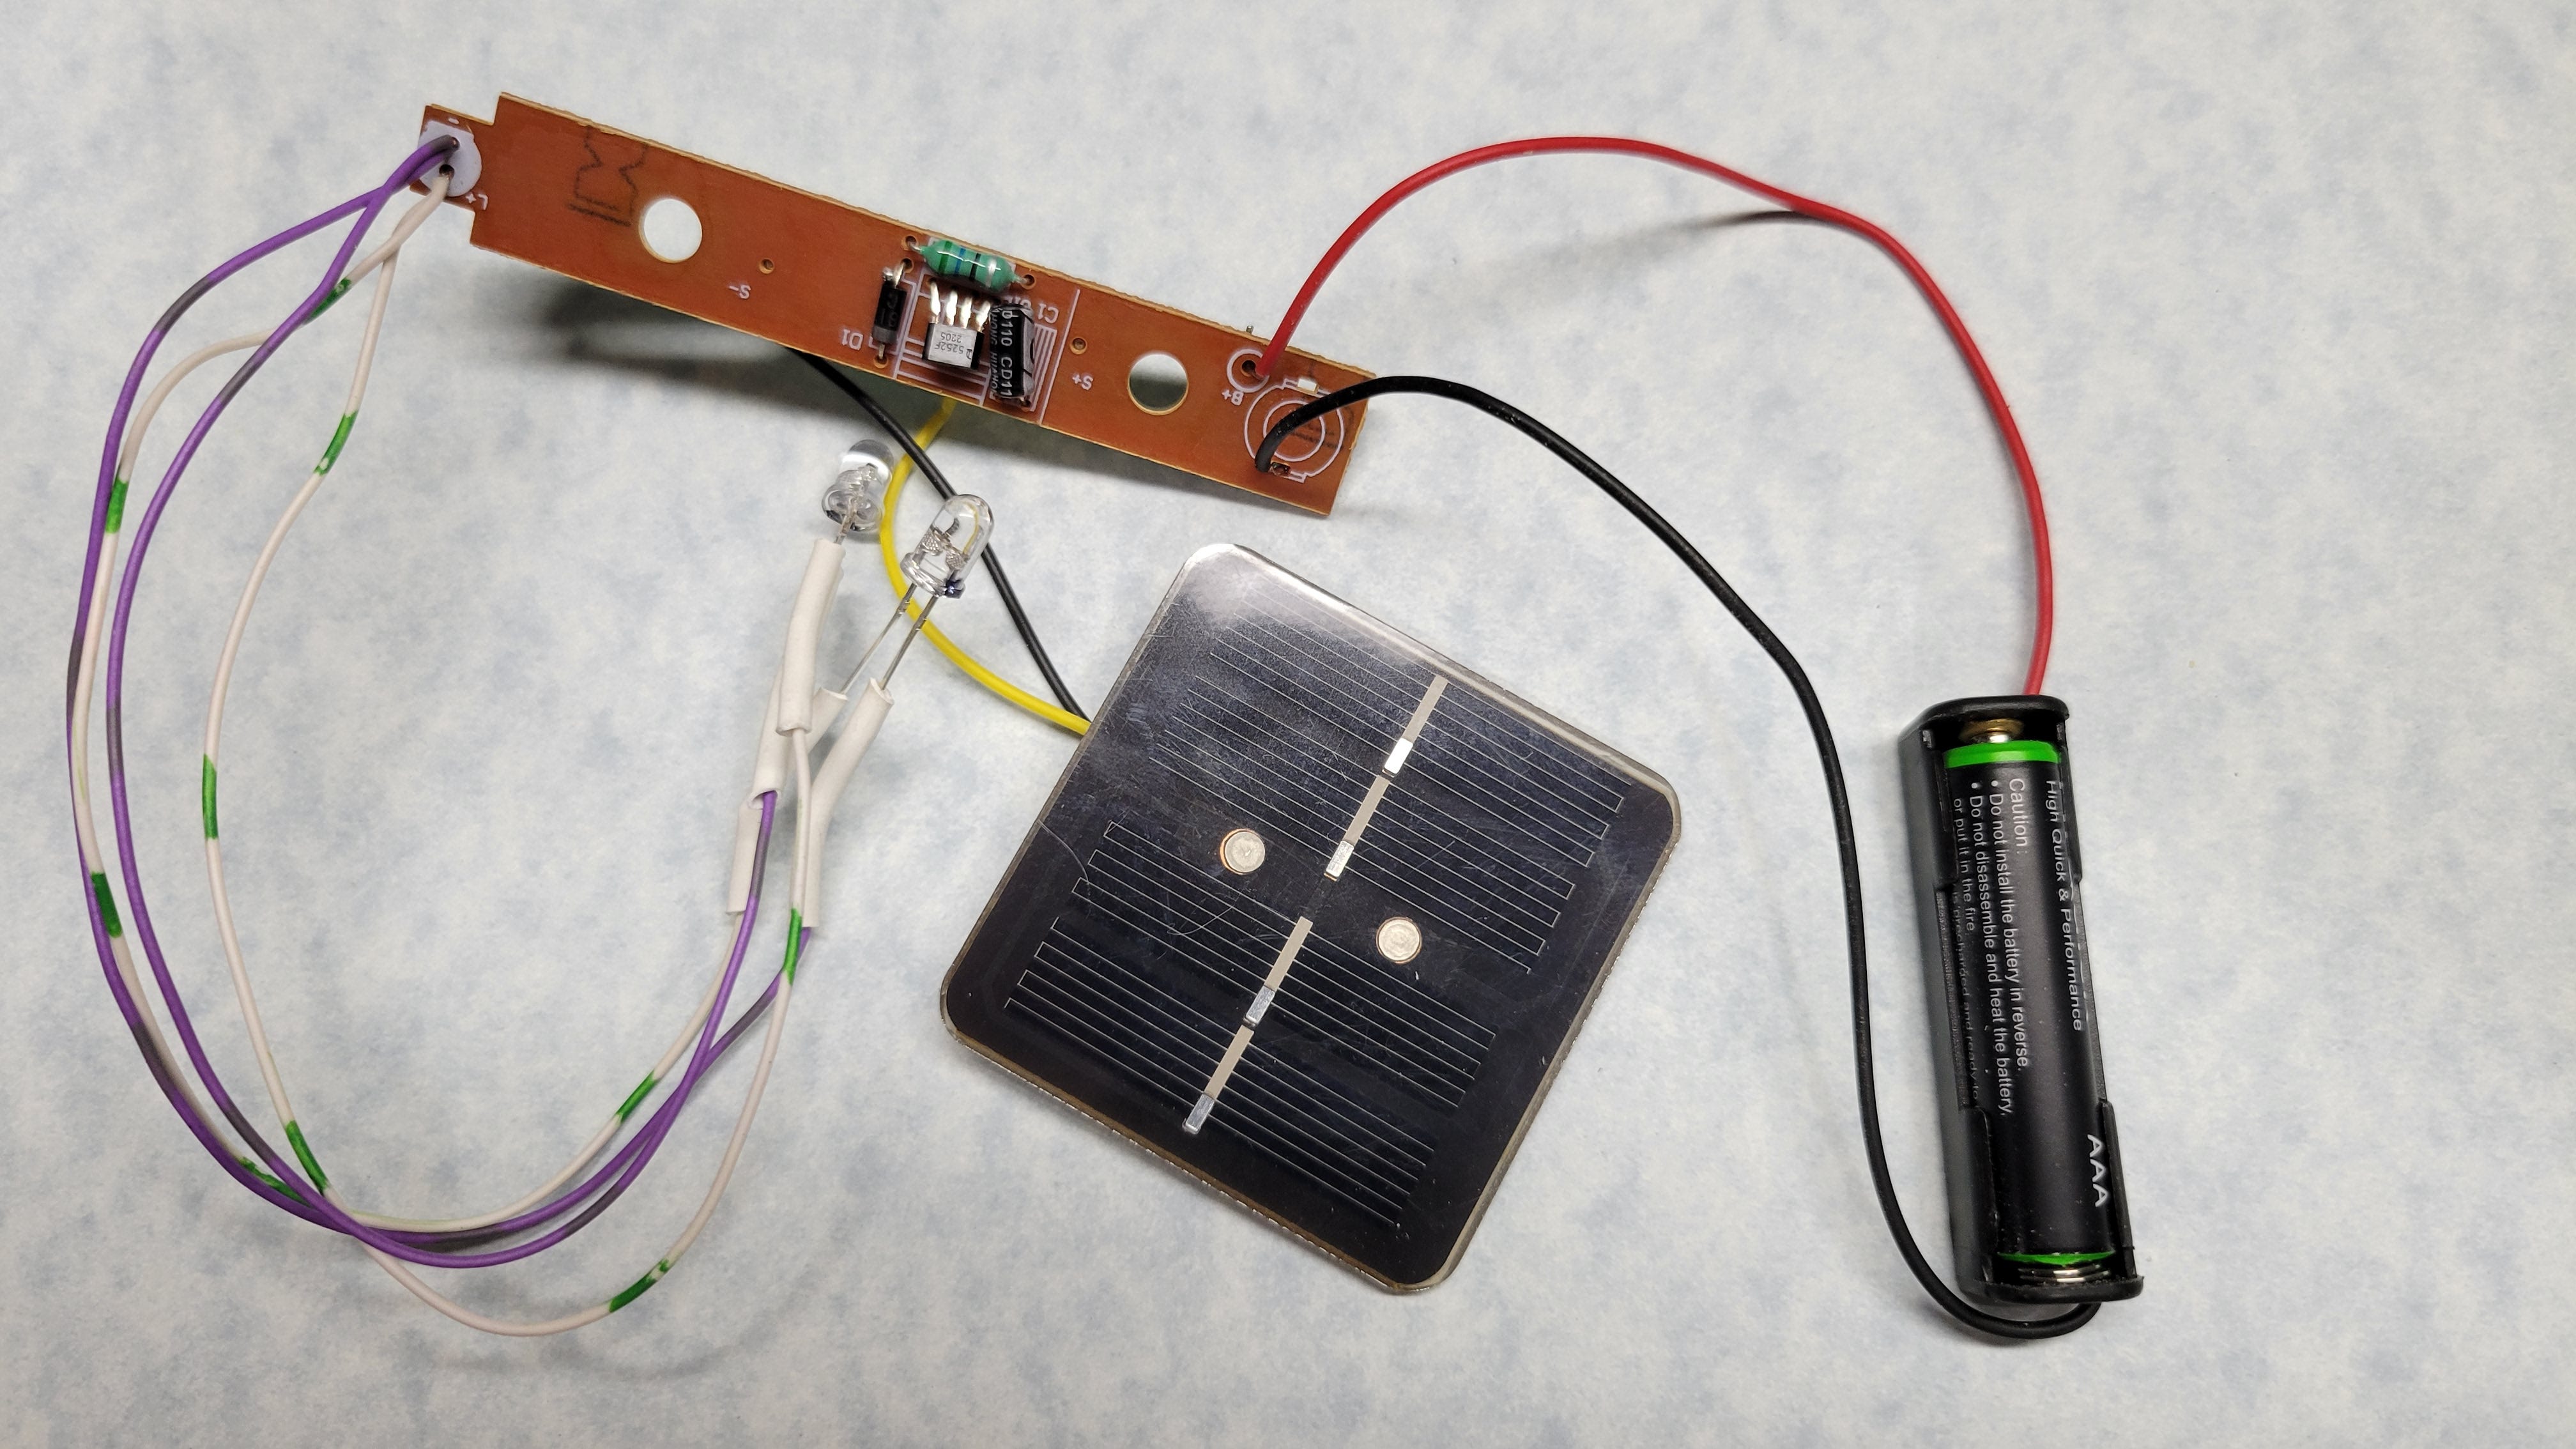
Testing showed 53mA from the battery and 23mA to the LEDs, with some variance in LED current as the colors cycled on and off. As a current limiting driver, the LED forward voltage adjusts as needed. But there was a problem. At times, but not always, the RGB LEDs didn’t complete their color cycle but started over instead. I knew the most likely reason was fluctuating power to the LEDs. I added a larger capacitor for more storage and things ran as expected. Note that here, larger means a higher capacitance value of 470uF from the original 47uF. The new capacitor happens to be physically larger than the original, but that may not always happen. I chose 470uF because that’s what I had in my box of used caps that wasn’t physically huge but had a higher value.
While the trip down the solar light driver rabbit hole was enjoyable, what good is it for geocaching?
With solar lights as cheap as $1.25, they can be used in place of fire tacks for night caches. Adding colors or blinking can show different paths.
Hide a cache container extremely well and only have its location shown with the LED at night. Cachers using a flashlight to search might make the beacon turn off, adding to the fun.
Have your gadget give a color coded sequence to unlock a combination lock or other task only at night. You can use the colors of the rainbow or the color codes for resistor bands as easy conversion from colors to numbers.
Hide more than one and tell the cacher to look north and count the red LEDs, then south to count the yellow LEDs, etc. to create a code.
Do you have any other ideas? Leave a comment!
Next week starts our discussion of sound in gadget caches with a game. Besides being fun to play, it shows how much can be done with puzzles and bringing the player into the world of the game using only sound. After that I’ll talk about sound in gadget caches. Want to build one of your own? That should be no problem after this article series. Until then, you might want to check out the name that tune gadget or the simple tone generator cache.