

Designing For Sound Part 3
Planning the C.A.C./H.E. machine


Last time, I planned a new gadget cache by creating a back story telling why the cacher is out in the woods at a specific location. I also explained the simple steps to solving the gadget. In this article, we will design an operator interface (sometimes called the HMI for Human Machine Interface).
NOTE: As I go through this build, I may list sources for supplies. These links will not involve any kickback to me, and I have no ties to any suppliers. My goal is to make this project reproducible for anyone who wants to try it. You can source similar items anywhere you like.
This gadget has a few steps:
At power on the cache should indicate it is energized but not ready for proper operation.
Using available info, the finder needs to tune the radio. This provides a greeting message and the first set of instructions.
The finder executes the command and enters info to prove completion.
This sequence is repeated two more times, for a total of three interactions to fix coordinates.
The device allows access to the log.
Step 1 – Power On
For now, we won’t talk about powering the gadget, that will come later. It is enough here to state that the user has powered on the gadget. If this were a real radio receiver, what would happen? Probably static until the desired station was properly tuned. Once the Arduino boots, it will signal the MP3 module to start playing a very long file of radio static. Five LEDs will come on in a combination of red and green. The layout of the device should hint that this color combination needs to be replicated to “tune” the device. The gadget remains in this state until the cacher completes tuning.
Step 2 – Tuning
The tuning method relies on five DPDT center off momentary toggle switches. You can find more info on using switches in an earlier MakerCaches article.
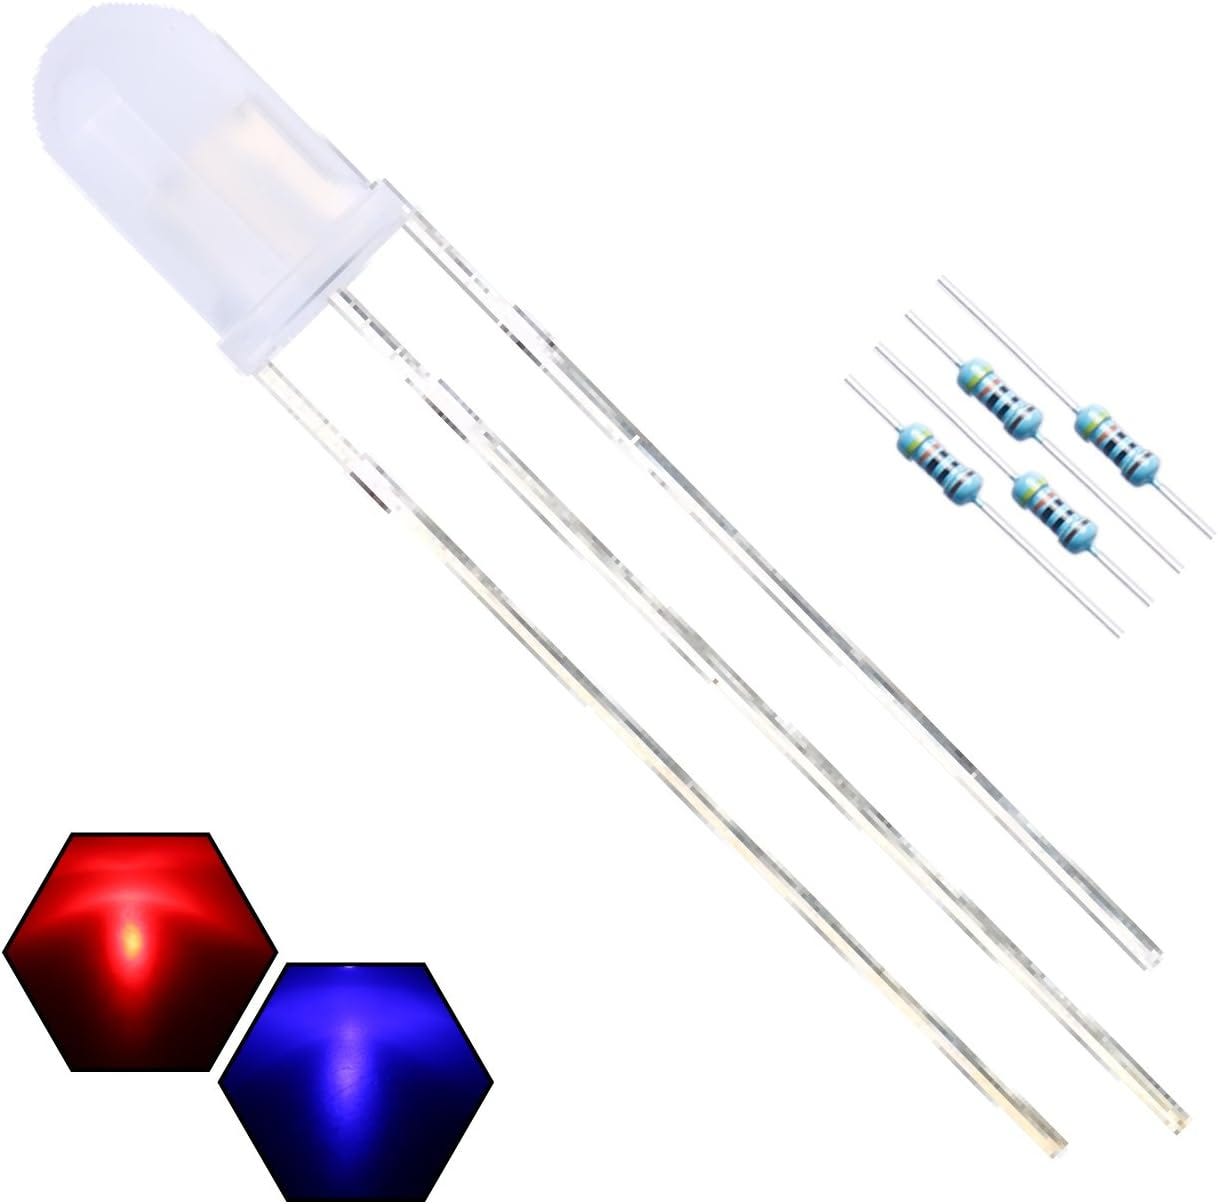
I like using momentary switches because the puzzle automatically resets itself for the next finder. One pole of each switch is used in series to complete a circuit. You will remember this from the Maker Magic build. This time we are going to use the other pole of each switch to light a red/green LED. These LEDs have a red and a green emitter inside what looks like a normal LED. If the switch is the center position the LED is off. If the switch is moved one direction the LED will be green, and in the other direction the LED will be red. Of course, there are other color combinations available so choose what works best for you.
When choosing LEDs, remember that they are polarized devices. Bi-color LEDs usually have one side of the LED as a common lead, giving a two-color LED three leads to connect in your circuit.
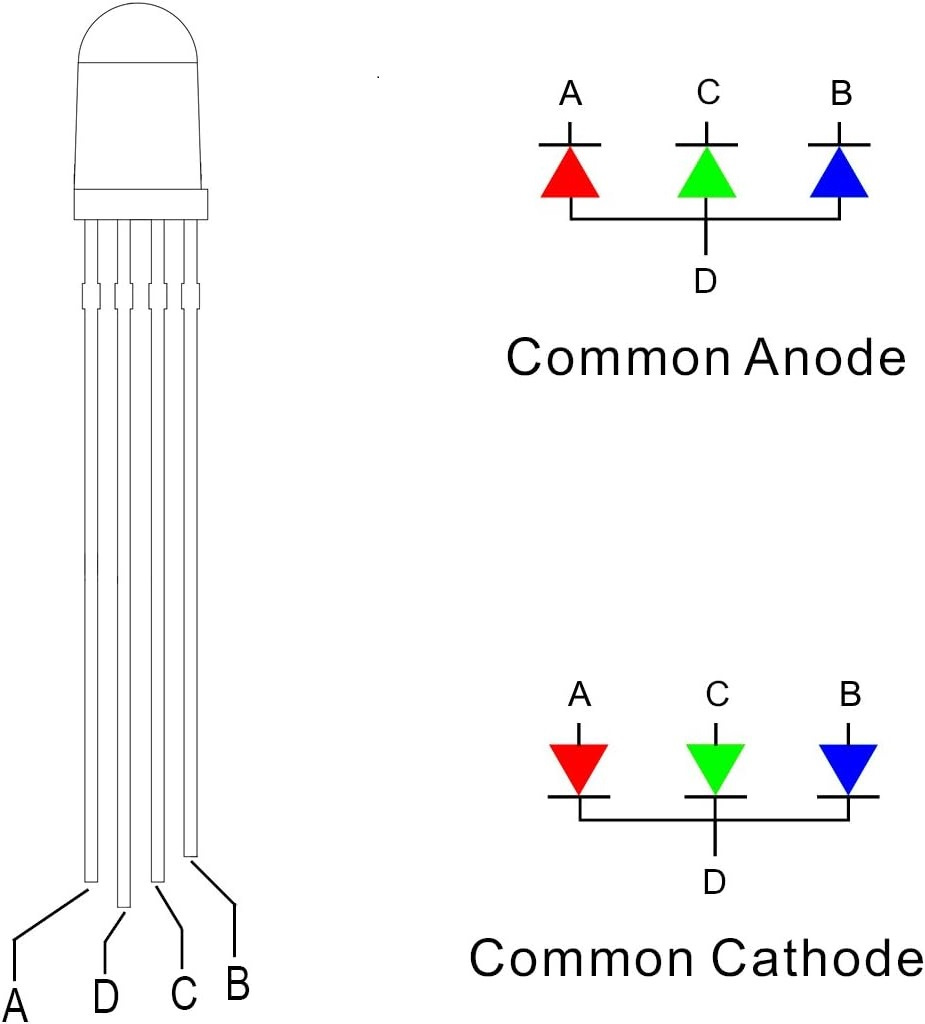
They are available as either common cathode (negative side) or common anode (positive side)devices. Choose what works best for your circuit. Bi-color LEDs are also available with two leads. You might wonder how these work. Inside are two LED emitters, arranged so that reversing the polarity of the voltage to the device changes the color.

LEDs also come in tri-color designs with four leads, with one common and the other three for the individual colors.
Of course, there are fully addressable RGB and RGBW LEDs but those take a more complex circuit to send data to their onboard controllers.
Setting all five toggle switches to the correct positions causes the five LEDs to match the colors of the target. It also sends a signal to our controller to move the puzzle to the next state, or state. We will talk about how these states come together inside the Arduino in a future installment. Moving to the next state turns on the Signal Lock LED and triggers a new MP3 file to play, congratulating the finder on tuning the receiver and giving the gadget’s instructions and first task.
Step 3, 4, and 5 – Tasks A, B, and C
For this gadget, I decided that the original researchers had placed their survey markers before they were run off (or worse) by the Albatwitch. The finder is instructed to locate the first of the three markers, arranged within 10 feet of the receiver. Each of the markers is a different color and each contains a numeric code for identification. For example, the cacher could be told to find the red marker and enter the code on the receiver.
Entering the code requires another set of HMI controls, capable of entering a multi-digit number. This could be done with a series of rotary multi-position switches,
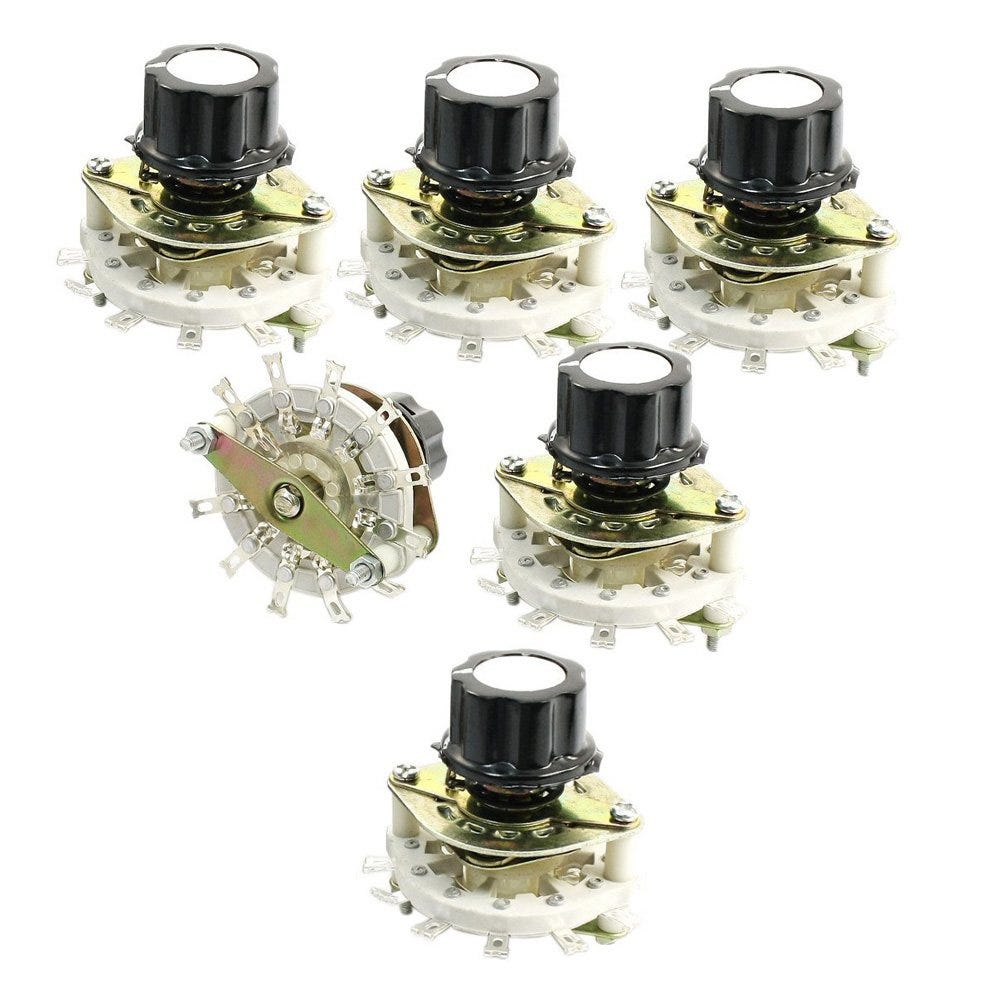
or it could be with a binary thumbwheel switch.

I’m going to make the discussion of how I choose the switches part of another article because there are many options to consider. It is enough for now that we will have a method to enter a two- or three-digit number. Two digits is easier to guess, but three digits could be broken through brute force if the cacher has enough patience. Once the code is entered the user presses the Enter button and the Arduino reads the code and decides if it is a match. If the code is correct, the gadget moves to its next state and plays a new MP3 file for the next marker. This process is repeated until all three marker codes are entered.
The gadget’s difficulty can be modified in this step. Entering the wrong code can be ignored, or it can make the machine reset to the start of task A, or it could even knock the machine out of tune requiring the finder to start over from the beginning. As I watch logs on my hides and others in my area, I’m noticing that at least near me more favorite points come from simpler gadgets. If it looks complex people won’t try for it. This matches the play testing I did at my event a few years ago. A cache that takes more than about 10 minutes to open will cause some cachers to lose interest. I’m going to just ignore wrong code entries, but simple code changes will allow these other options.
Step 6 – Reset
This one is optional, but I like to find ways to make the finder reset the puzzle. Telling the finder that all three codes have been correctly entered and then asking them to set the code switches to a new setting to access the log keeps the dials from being left in the position of the last code. In software this will look just like steps 3, 4, and 5 so we could call this task D.
Step 7 – Reveal the Log for a Find
There are many options here. A solenoid or servo could open a locked door or drop a container, but these techniques add complexity and increase current draw on the power supply. I like to keep things no more complex than necessary. My gadget will play a congratulatory MP3 file revealing the combination to the locked log container. We might even add an entry at the front of the log book revealing that the lost researches all decided to go somewhere nice for a long vacation after their scare. That gives our story a happy ending. A similar idea, but with a torn red stained page might hint at a more sinister ending. The choice is yours!
But Will It Work?
With the gadget planned, the next design step is to make sure it can be built. Think about a few questions:
Do I have or can I get the components needed for this project?
Do I have a way to power the device, or can a finder easily power it? Asking the finder to bring a car battery on a 3-mile hike is not a good idea. I did spend an entire afternoon hiking with a bicycle pump for a series of gadget caches, but that isn’t the norm.
Are there enough I/O (input and output) pins on the chosen microprocessor? (More on this later.)
Can I fit this gadget into a container that is suitable for the hide location?
I can answer yes to all these things using an Arduino Nano or Uno, and placing the circuit inside an ammo can or similar waterproof box. Now that we know it can be built, we can sketch an idea for fitting it into a box. Don’t be afraid to change the layout as you refine your design and make choices about the container and other details.
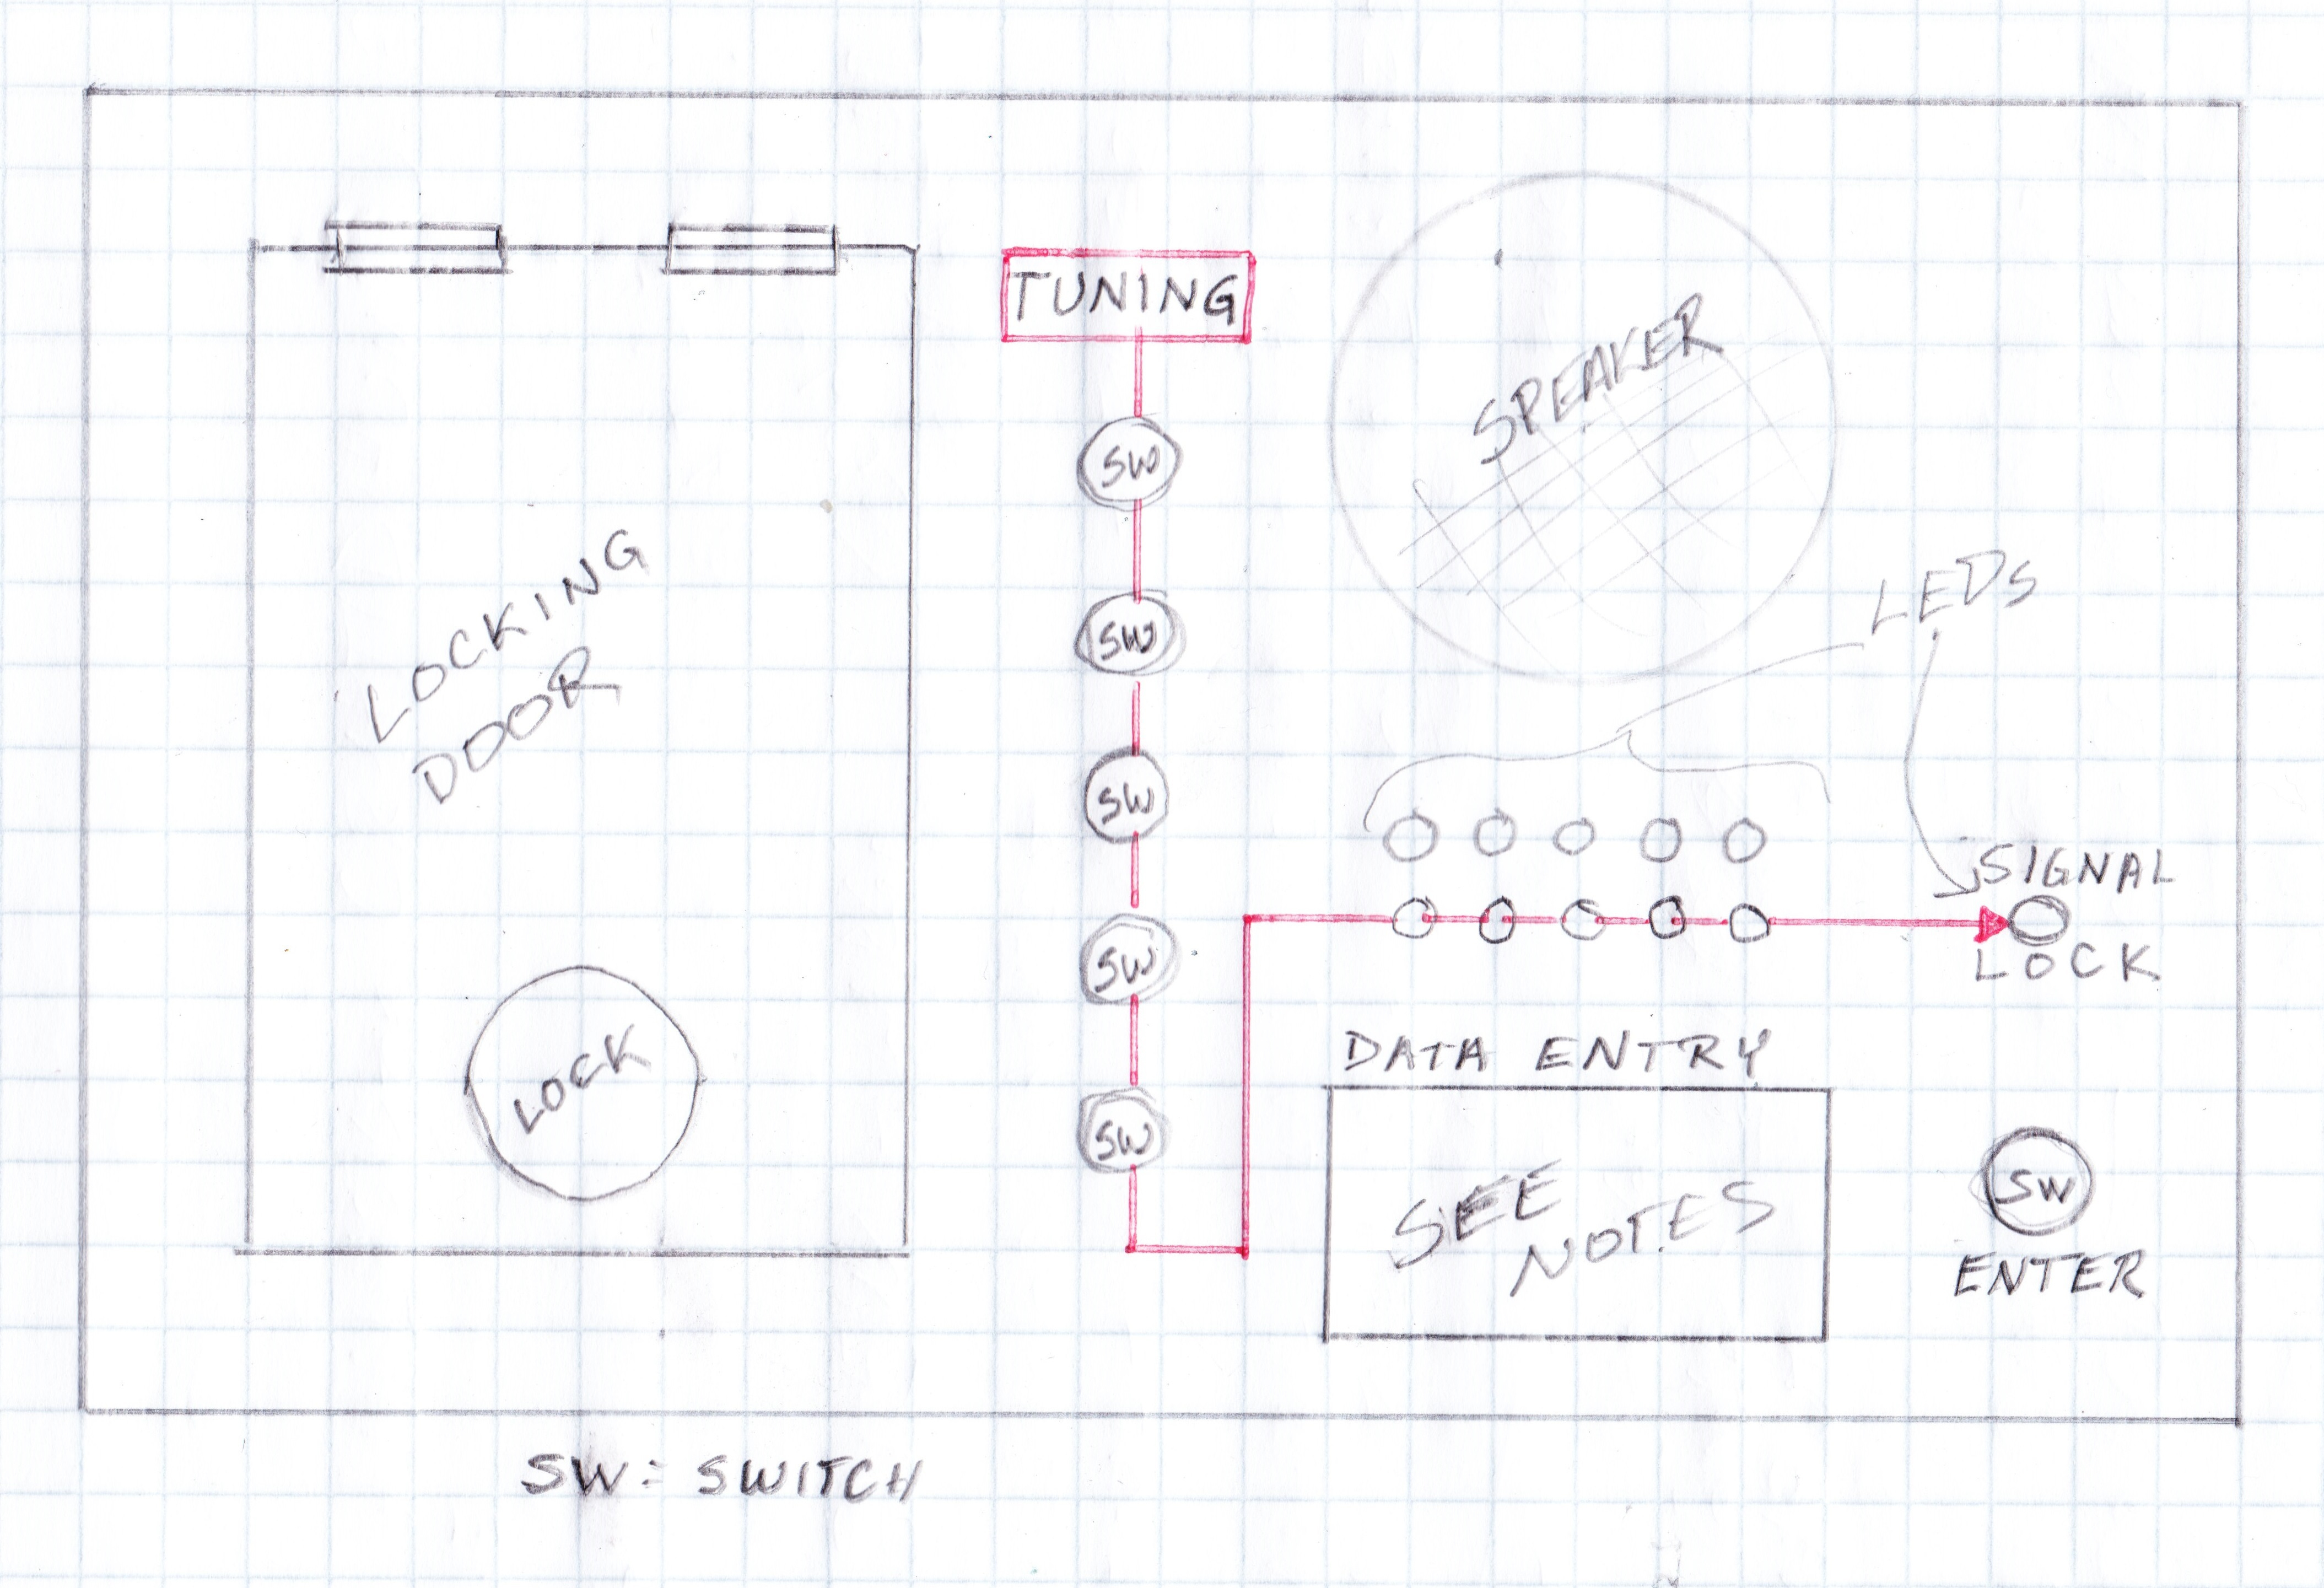
I will continue this design in the next article. There are still many things to discuss. By the end of this series you will have all the info to build your own working gadget.
Between articles, make sure you watch the Notes section of MakerCaches. I’m feeding a steady stream of interesting notes related to geocaching and gadget making - Arduino emulators, podcasts, tech notes, and other interesting topics. This lets me post more items without subscriber notices filling your inbox. I hope you’ve subscribed. If not, please do – it’s free.